
How to Build a Mining Rig in 2024: A Step-by-Step Guide
Recently, the profitability of cryptocurrency mining has begun to surge again. After a depressing 2022 for the crypto market, hash rates for Bitcoin have started to climb due to the BTC price rally, and with the highly anticipated Bitcoin halving on the horizon, experts predict that mining profits will skyrocket in the near future. Thus, there has been renewed interest in building one’s own mining rig in 2024.
If you’re considering joining the ranks of cryptocurrency miners, you may be wondering what components are needed and how to put it all together. In this article, we will delve into the essentials of creating a mining rig and provide a step-by-step guide to help you on your mining journey.
Key Takeaways:
- Building a mining rig requires specific hardware and software components, along with proper assembly and configuration.
- Proper BIOS settings, software installation, and regular monitoring can optimize mining rig performance and profitability.
- 2024 is projected to be a highly lucrative year for Bitcoin miners due to factors like the rise in hash price and transaction fees.
- The upcoming Bitcoin halving event in 2024 may further increase mining equipment demand and drive profits.
What Is Cryptocurrency Mining?
But what is crypto mining essentially? Let’s start with the basics.
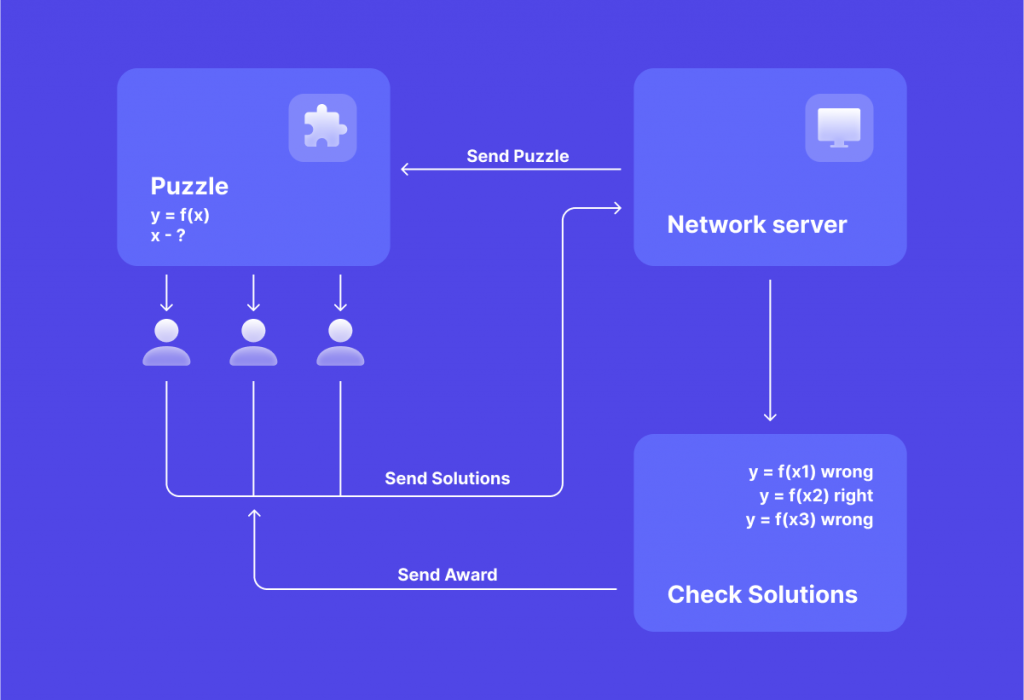
Cryptocurrency mining is the process of creating new units of a digital currency by using powerful hardware to solve complex mathematical problems. This process is integral to securing decentralized and distributed networks, such as those used in blockchain technology.
Some History
The first and the most popular coin for mining today is Bitcoin, of course. As the first cryptocurrency invented in 2009, Bitcoin’s success and popularity sparked the creation of numerous other digital currencies using a similar mining model.
At the beginning stages of Bitcoin, mining difficulty was relatively low, allowing miners to obtain significant amounts of the digital currency. This presented a lucrative opportunity for early mining enthusiasts who profited immensely from Bitcoin’s increasing value over the years.
How It Works
At its core, the crypto mining process relies on a consensus mechanism called Proof-of-Work (PoW). This mechanism involves miners using computational power to mine blocks of transaction data and add them to the blockchain ledger. The first miner to complete the task is rewarded with units of the network’s cryptocurrency.
Fast Fact
Another popular consensus mechanism is called Proof-of-Stake (PoS), which was introduced as an alternative to PoW. Instead of using computational power, PoS relies on the concept of “staking,” or holding a certain amount of cryptocurrency and using it to validate transactions on the network.
The number of miners on a network directly impacts mining difficulty levels. As more miners join, the difficulty increases, and vice versa. This mechanism regulates the time it takes to mine blocks, preventing coins from being generated too quickly or too slowly. It helps to ensure consistent transaction processing times and maintain the integrity of the network.
Due to the increasing complexity of mining tasks, more and more computational power is required to mine coins successfully. Thus, specialized hardware is necessary today to earn profits from this venture effectively. As a result, miners often purchase powerful hardware units, such as ASICs and the latest NVIDIA GPUs, and sometimes many of these, to increase their chances of successfully mining blocks.
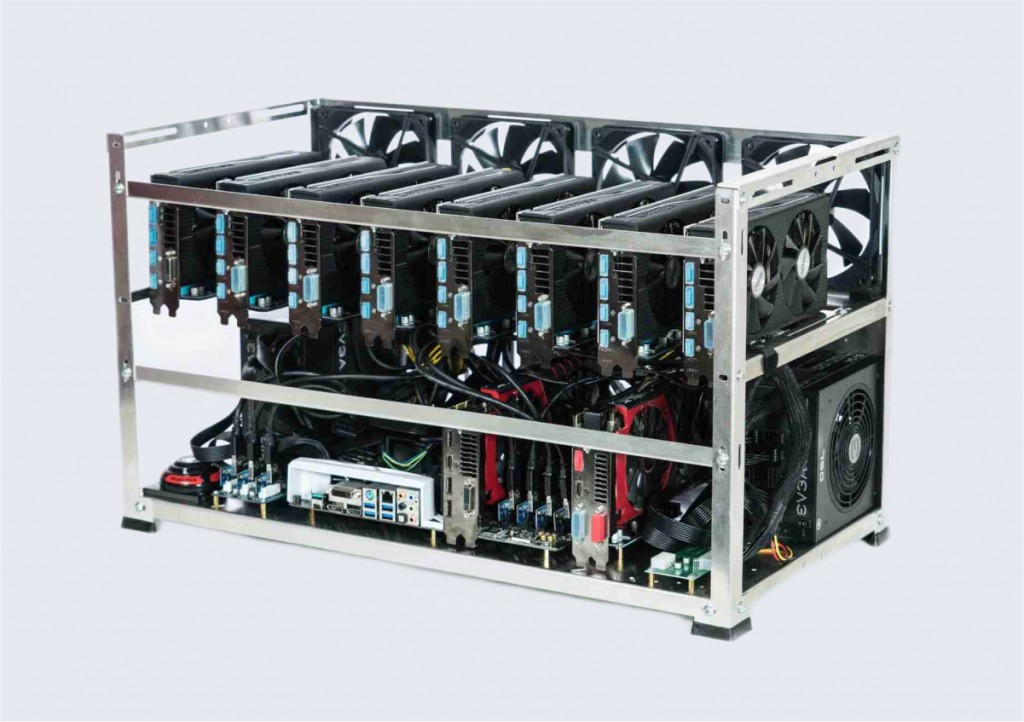
What Parts Are Needed for Your Mining Rig?
Enough theory – let’s get down to practice. Several key components are required to build a Bitcoin mining rig. Let’s take a closer look at each component and what role they perform in the overall rig:
GPUs or ASICs
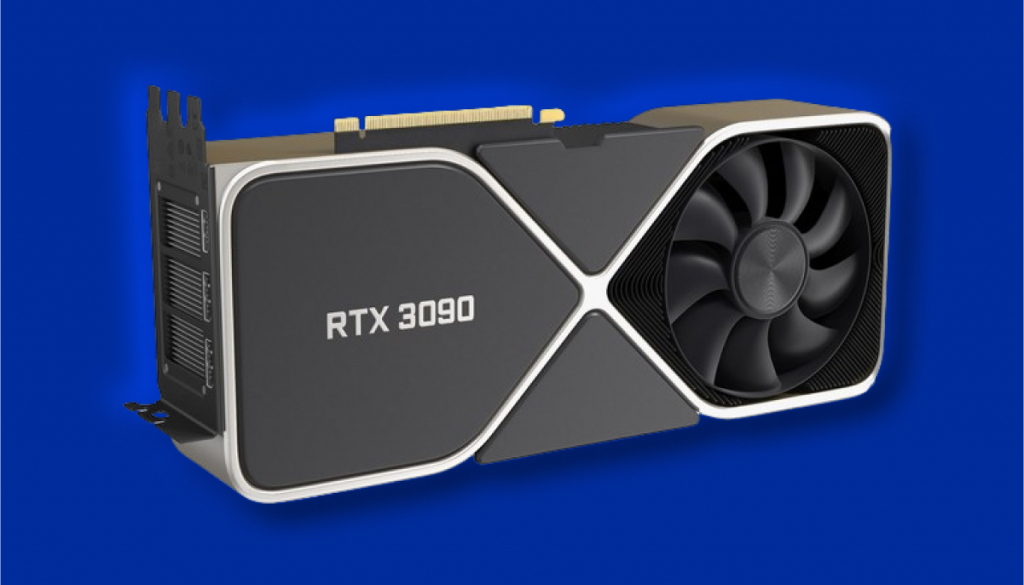
The GPUs (graphics processing units) are the workhorses of a mining rig, responsible for performing the complex calculations required for mining. When selecting GPUs, consider hash rate, power consumption, and cost-effectiveness factors. Research the specific requirements of the cryptocurrency you plan to mine, as some cryptocurrencies may be better suited for specific GPU models.
Best GPUs for mining: last NVIDIA GPUs (30 or 40 series) or last AMD Radeon models (RX 6800, 6900 XT, 7000 series)
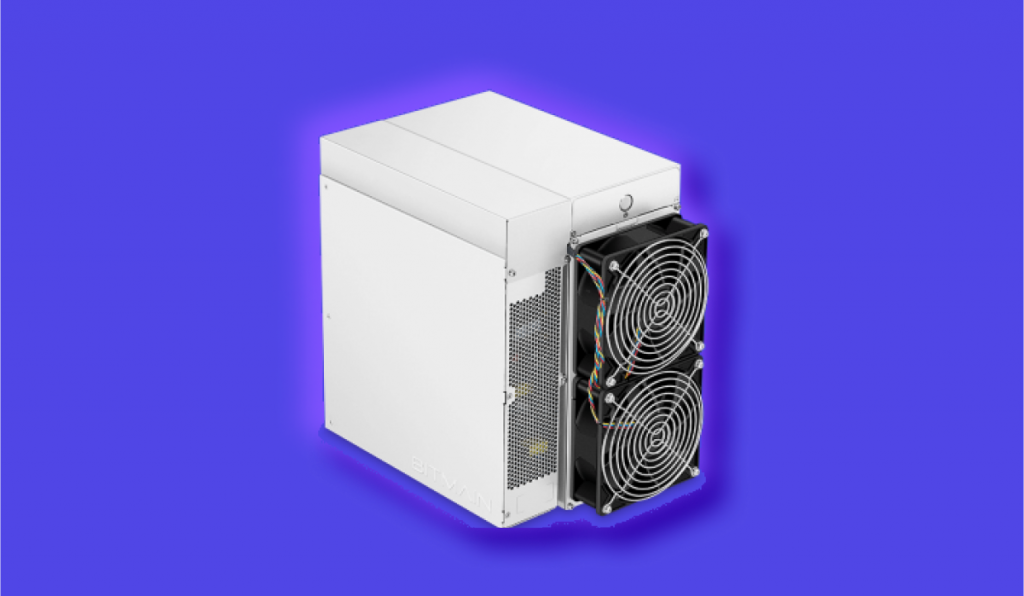
In turn, ASICs (application-specific integrated circuits) are specialized hardware designed particularly for cryptocurrency mining. They are more efficient and powerful than GPUs but also come at a higher cost.
Best ASICs for mining: Antminer S19 XP, Whatsminer M32-70, AvalonMiner 1246, A10 Pro.
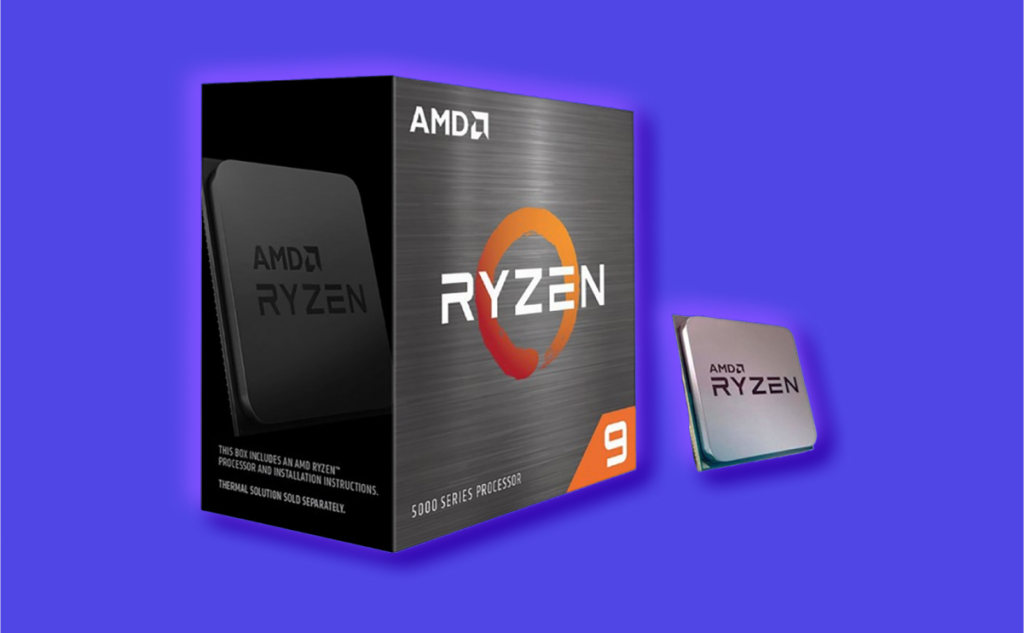
CPU
While the CPU’s (central processing unit) role in cryptocurrency mining is relatively minimal compared to the GPUs, it is still an essential component. The CPU is responsible for managing the overall operations of the cryptocurrency mining rig. When choosing a CPU, consider factors such as core count, clock speed, and compatibility with the motherboard.
Best CPUs for mining: AMD Ryzen 9 series, Intel Core i9 series, and AMD Ryzen Threadripper for those with enough funds.
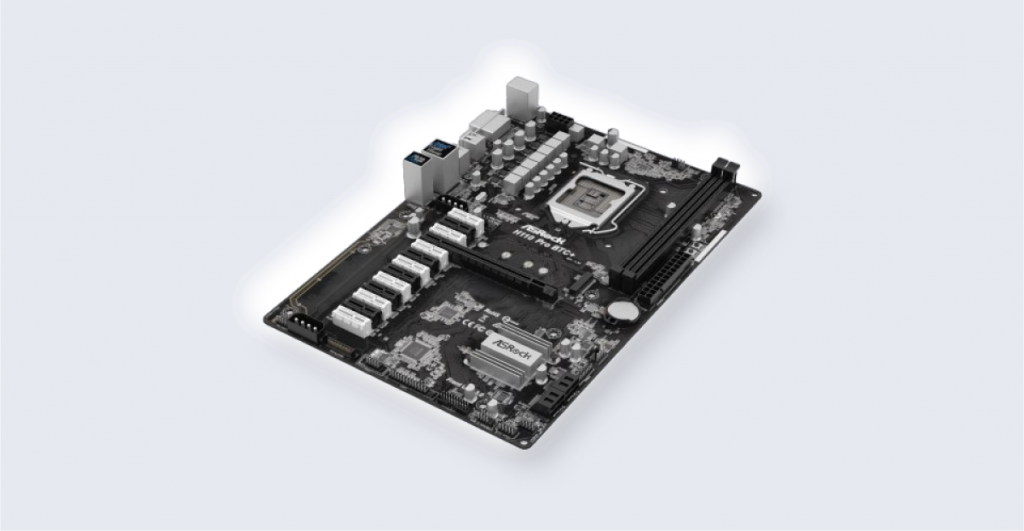
Motherboard
The motherboard serves as the central hub of the mining rig, connecting all the components together. Consider factors such as compatibility with the chosen CPU and GPUs, the number of PCIe slots available for GPU installation, and the overall quality and durability of the motherboard.
Best motherboards for mining: ASRock H110 Pro BTC+, CREAMIC BTC-37, Asus B250 Mining Expert, MSI H310-F PRO.
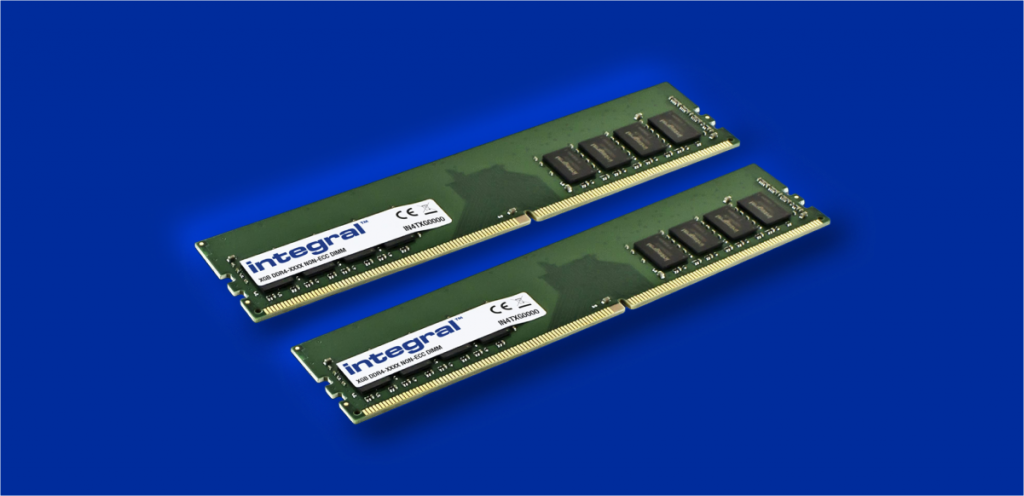
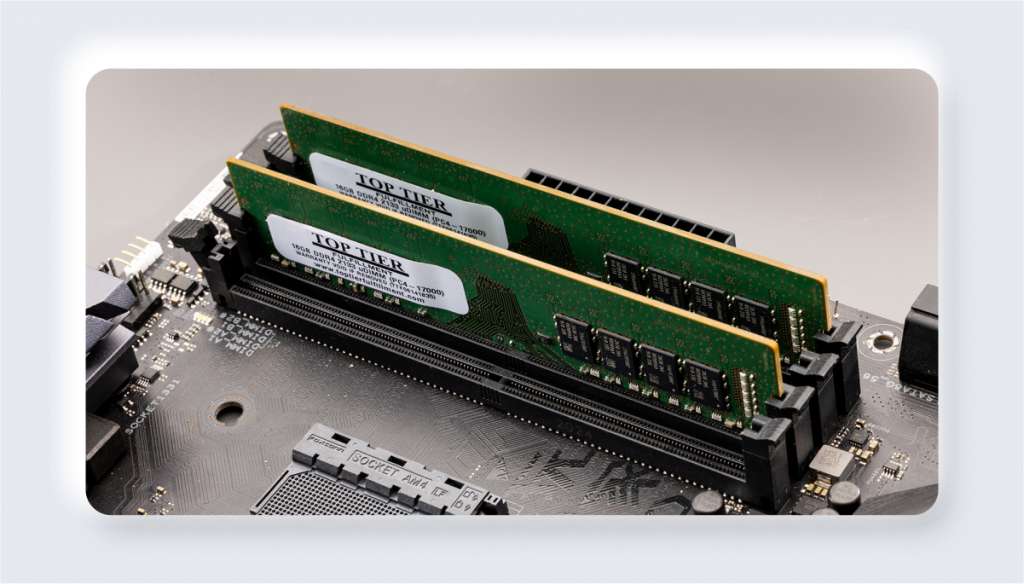
RAM
RAM (random access memory) is crucial for the smooth operation of the mining rig. It allows for efficient data processing and storage, ensuring that the rig can handle the computational demands of mining. When selecting RAM, consider capacity, speed, and compatibility with the motherboard.
Best RAMs for mining: DDR4 or DDR5 RAMs with a minimum 4GB or 8GB of memory.
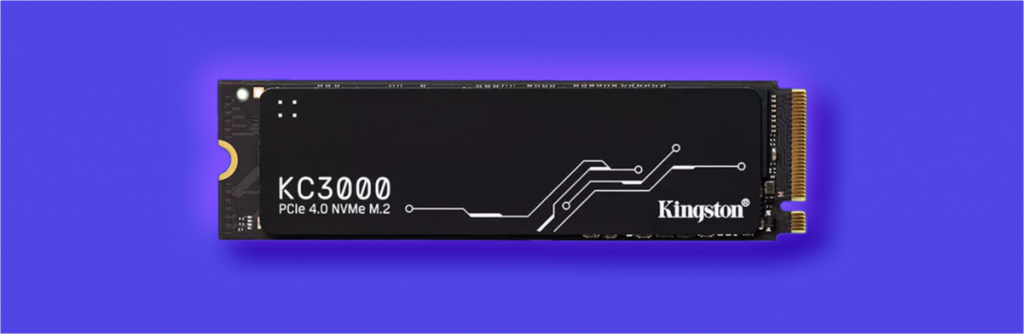
Storage
Storage is necessary for installing the operating system, mining software, and storing mined cryptocurrency. Solid-state drives (SSDs) are recommended for faster boot times and data access. Hard disk drives (HDDs) are not recommended but can also be used if cost is a concern.
Best SSDs for mining: either NVMe PCIe 3.0/4.0 or SATA 3 SSDs are the best options.
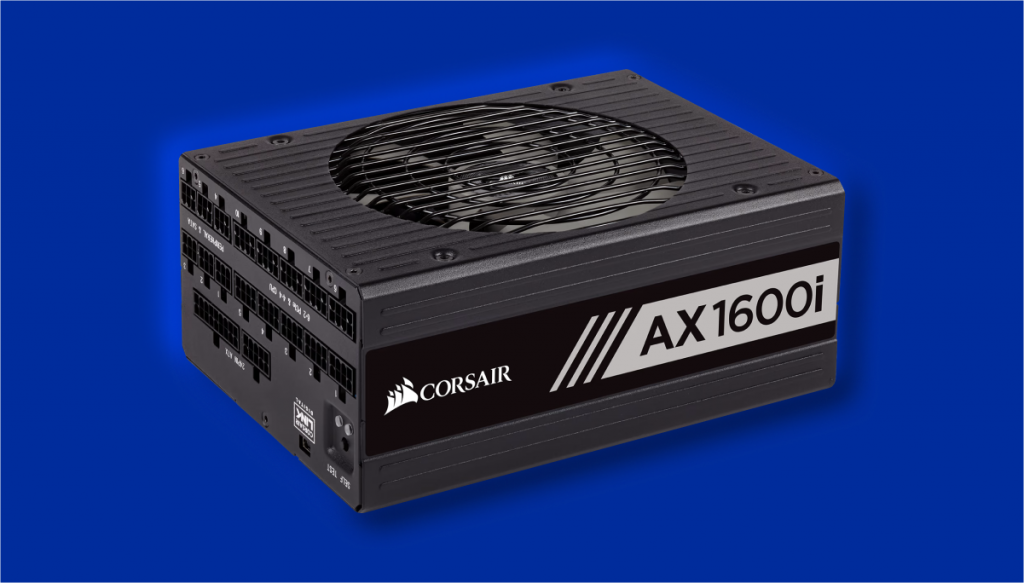
PSU
The PSU (power supply unit) provides the necessary power to all the components of the mining rig. Choosing a high-quality PSU with sufficient wattage to handle the power requirements of the mining rig is in your best interest. Consider factors such as efficiency, modular design, and reliability.
Best PSUs for mining: Gold or higher 1600W or 2000W PSUs.
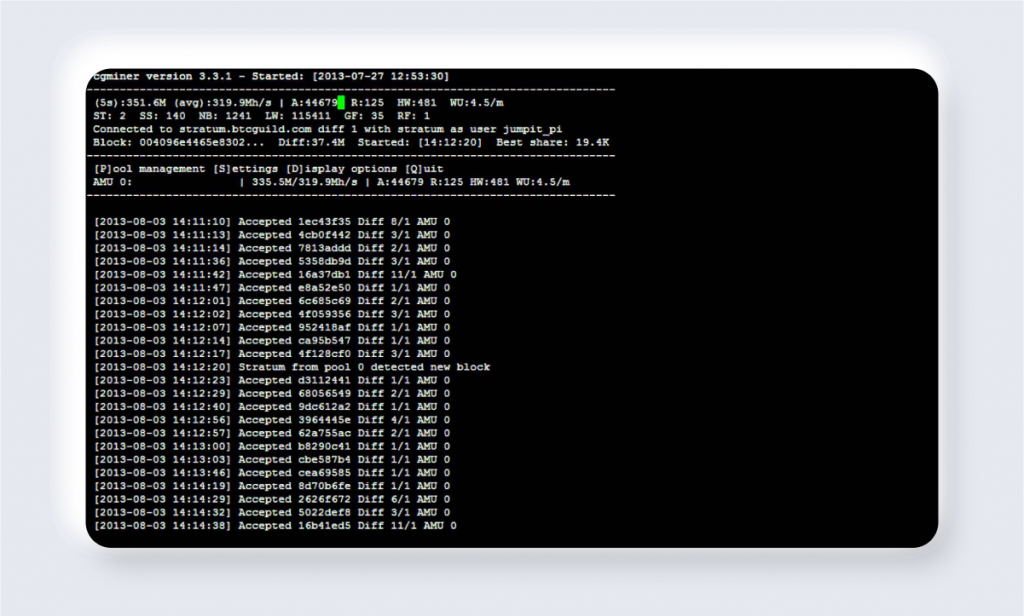
Mining Software
Mining software is essential for configuring and managing the mining rig. There are various mining software options available, each with its own features and compatibility. Research and choose software compatible with your chosen cryptocurrency that offers optimal performance and stability.
Best mining software: CGMiner, EasyMiner or BFGMiner.
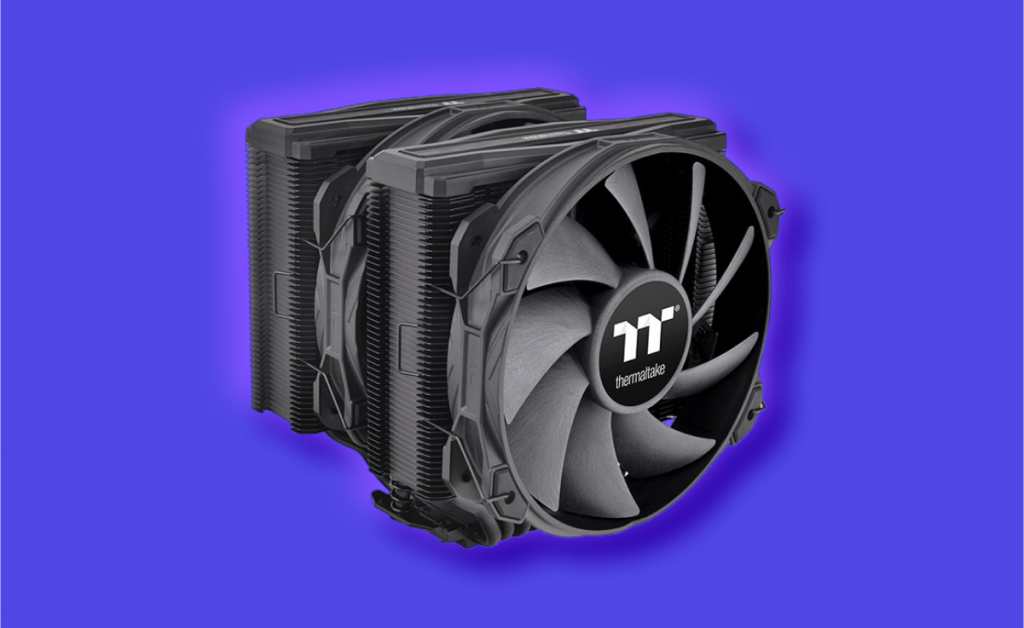
Cooling
Mining rigs generate a lot of heat, making proper cooling crucial for their operation. Using multiple fans and/or water cooling systems is recommended to keep the components at optimal operating temperatures. Consider airflow, fan speed, and noise level when choosing a cooling system.
Best cooling systems for mining: Fans or liquid cooling systems with high airflow and low noise levels.
You will also need a stable internet connection, an operating system to support your mining, like Rave OS or Windows, and a reputable crypto wallet to hold your mined crypto assets. To choose the one suitable for you, check our guides on the best crypto wallets.
How to Build a Mining Rig?
Now that we have covered the essential components, let’s dive into the step-by-step process of building a mining rig:
Step 1: Prepare the Motherboard And Attach the CPU
Start by placing the motherboard on a static-free surface. Ensure that the CPU lever socket is in the released position.
Step 2: Install the CPU and Cooler
Carefully insert the CPU into the appropriate socket, aligning the notches on the CPU with the socket. Lock the CPU in place by gently lowering the lever.
Be careful! It is not a good idea to bend the CPU pins. Also, for the best and safest result, read the manuals that come with every part of your rig.
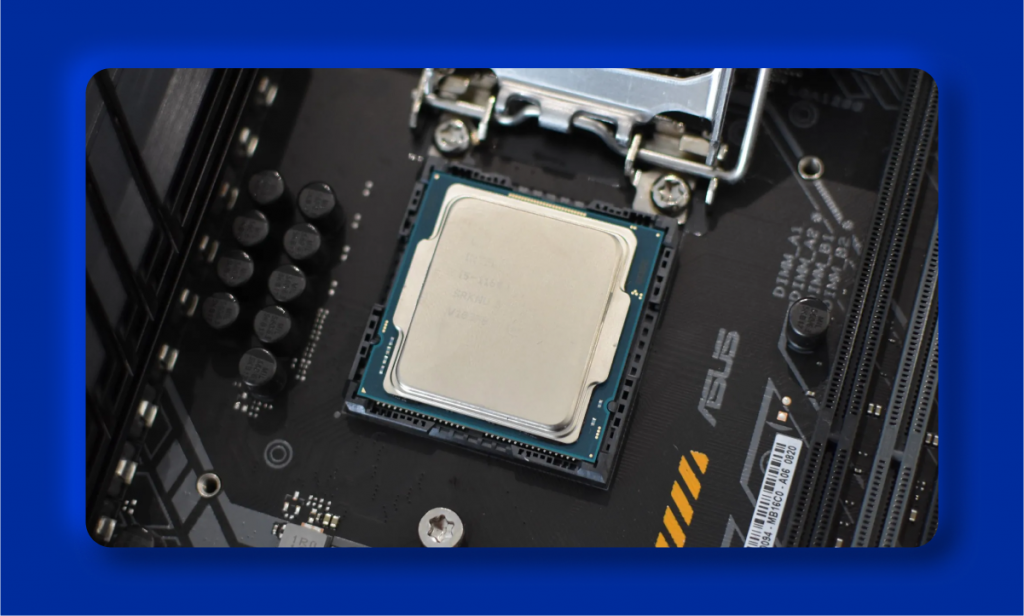
Apply a thin layer of thermal paste to the top surface of the CPU. Thermal paste is necessary because it helps to create a better heat transfer connection between the CPU and the CPU cooler. It ensures that the CPU does not overheat, allowing the mining rig to run efficiently and avoiding damage to the components.
Next, attach the cooler, ensuring that it is securely fastened and making proper contact with the CPU. Connect the cooler’s power cable to the motherboard.
Step 3: Install RAM
Insert the RAM modules into the appropriate slots on the motherboard. Apply gentle pressure until the RAM modules click into place. Ensure that the locking mechanisms on the RAM slots are secured.
If you have a PCIe NVMe storage card, it is better to connect it in this step.
Step 4: Mount the Motherboard
Place the motherboard into the mining rig frame, ensuring that it aligns with the mounting holes. Use screws to secure the motherboard in place, taking care not to overtighten.
Step 5: Connect Power Supply Unit (PSU)
Position the PSU in the mining rig frame near the motherboard. Connect the necessary power cables to the motherboard, CPU, and GPUs. Ensure that all connections are secure and properly seated.
Step 6: Install GPUs
Attach the GPUs to the mining rig frame using risers or brackets. Connect the power cables from the PSU to the GPUs, ensuring that each GPU receives sufficient power. Secure the GPUs in place and ensure proper airflow between them.
Locate a free PCIe slot on your motherboard and connect the x1 end of the USB riser. Don’t worry about which PCIe slot to use; both x1 and x16 will work just fine. Once the riser is securely in place, it’s time to attach the GPU.
Next, connect the x16 end of the USB riser to the GPU. This will ensure that your graphics card is properly connected to your motherboard and ready to mine. Now comes the final stage of the riser installation – connecting a USB cable between the x1 and x16 USB riser cards.
To complete the connection, you’ll need to take care of power. Start by connecting power cables to the x16 end of the USB riser connected to your GPU. Depending on your PCIe riser model, this could be a 6-pin PCIe connector, 15-pin SATA, or 4-pin Molex cable. Lastly, connect the PSU’s PCIe 6+2 power cables to the GPU.
However, checking with your manual to install pin cables correctly will be better.
Step 7: Connect Storage and Peripherals
Connect the storage device (SSD) to the motherboard using the appropriate cables. If you have PCI NVMe storage, connect this to a free PCIe x16 slot.
Connecting PCI NVMe is better when you install your RAM.
Then, connect a monitor, keyboard, and mouse to the mining rig for initial setup. That’s it – your mining hardware is ready.
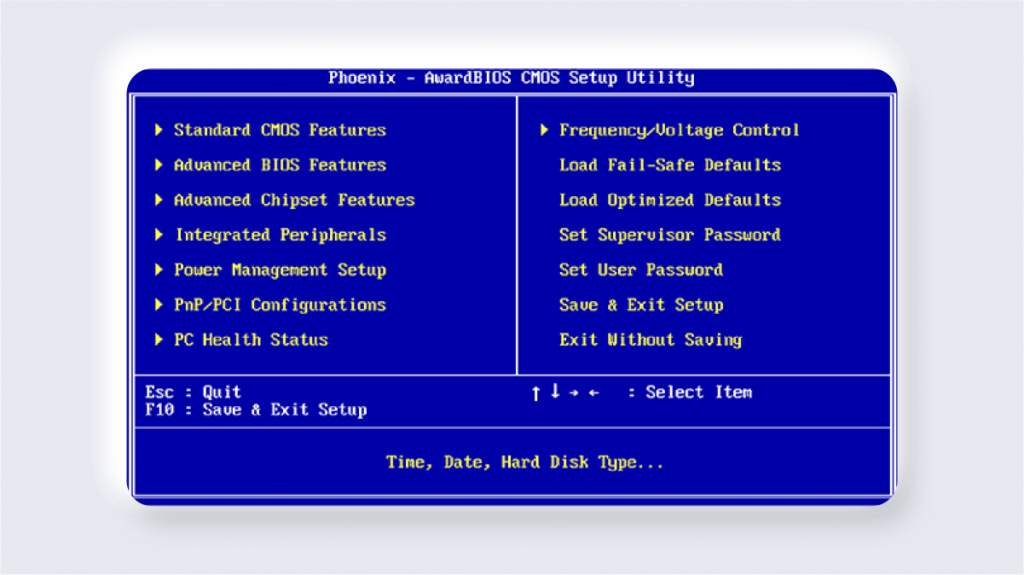
Step 8: Configure BIOS Settings
Now, it’s time to set up your software.
Power on the GPU mining rig and enter the BIOS settings by pressing the designated key during startup (often Delete or F2). Configure the BIOS settings to recognize all the connected hardware, enable above 4G decoding, and adjust other necessary settings.
Step 9: Install and Configure Mining Software
Insert a USB flash drive containing a pre-configured bootable Windows OS into an available USB slot on the motherboard. Give it a moment to boot up, then proceed with the installation steps to install the operating system.
Turn off all additional functions and extras like OneDrive, etc. It won’t improve your rig’s mining efficiency. Download the latest drivers for your GPU for better performance.
Install the mining software of your choice on the mining rig’s storage device. Follow the software’s instructions to configure your mining rig, including selecting the desired cryptocurrency to mine and connecting to a mining pool if desired. Ensure that all configurations and settings are properly saved.
Step 10: Test and Monitor
Restart the mining rig and monitor its performance. Ensure that all GPUs are recognized and operating at the expected hash rates. Monitor temperature levels and adjust the cooling system as needed to maintain optimal operating temperatures. Keep an eye on the mining software to ensure that it is functioning correctly and mining the desired cryptocurrency.
Step 11: Secure and Optimize
Implement proper security measures to protect your mining rig, including regular software updates, strong passwords, and firewall configurations. Optimize the mining rig’s settings, such as GPU overclocking and power management, to maximize efficiency and profitability.
Step 12: Start Mining
With your mining rig successfully built and configured, you can start mining cryptocurrencies. Monitor the mining rig regularly, adjusting settings and troubleshooting any issues. Stay updated on the latest developments in the cryptocurrency mining space to optimize your mining operations.
Why Mine in 2024?
Bitcoin mining is a highly competitive and lucrative industry, with miners constantly seeking ways to boost their profits.
One key metric that miners use to measure the value of their computing power is the hashrate index – the amount of money earned per petahash (PH) of mining equipment. And according to recent data, 2024 may be an especially profitable year for Bitcoin miners.
On December 6, 2023, the hash price for Bitcoin surged to a staggering $110/PH/day. This is almost double the October 2023 numbers of around $60/PH/day. In other words, miners with just one petahash of equipment were expected to earn $110 per day in revenue – an increase representing potential profits of over 80% compared to just two months ago.
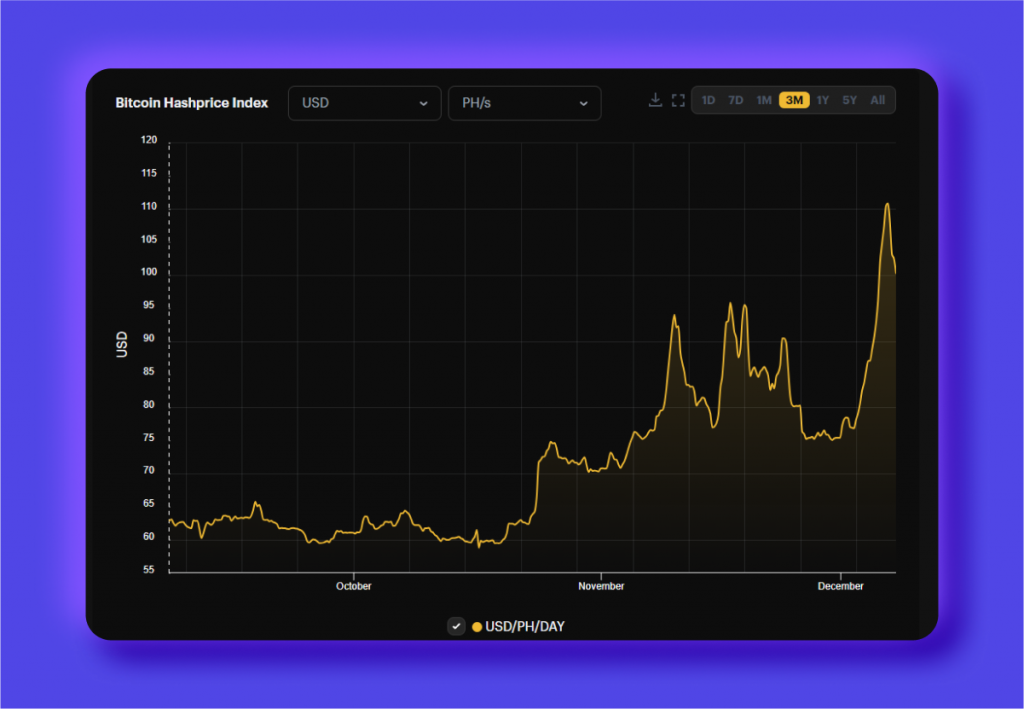
This impressive rise in hash price can be attributed to several factors, including Bitcoin’s ongoing price rally. On that same day, the price of BTC reached a high of $44,000 – a milestone projected to continue well into 2024. In fact, with the highly-anticipated Bitcoin halving event on the horizon, many analysts believe that BTC could reach historic highs.
What is halving? Many cryptocurrencies, including Bitcoin, have a halving mechanism in place. It reduces the rate at which new currency units are generated and promotes scarcity. For example, Bitcoin’s recent halving in May 2020 reduced the mining reward from 12 BTC to 6.25 BTC. The next halving is predicted to occur in 2024 and will further reduce the reward to 3.125 BTC.
But it’s not just the rise in Bitcoin’s price that has contributed to the increase in hash price. Transaction fees have also significantly grown, thanks to the rising popularity of Bitcoin-based non-fungible tokens (NFTs). These unique digital assets, often in the form of BRC-20 tokens, have become the latest craze for investors looking to diversify their portfolios.
So why should miners continue to invest in mining in 2024? With the current trend indicating a surge in hash price and transaction fees, it’s clear that this is a highly profitable industry with the potential for even greater returns.
FAQs
What problems can arise when building a mining rig?
Building a mining rig can be complicated, and several potential problems can arise during or after the building process. Some common issues include a rig not booting, GPU not being recognized, frequent crashes, and overheating.
How do I troubleshoot a rig that won’t boot?
If your rig is not booting at all, it could be due to a faulty CPU, GPU, or connections between the two. If your display works, one of these components is likely causing the issue. If the display does not turn on, there could be a problem with your boot drive or corrupted data.
What should I do if my GPU is not recognized?
First, check all PCIe risers and cables to ensure they are properly connected. Then, make sure the GPU is functioning correctly and that all cables are securely connected to the PSU. If everything appears to be in order, try reinstalling your GPU drivers.
Why does my rig keep crashing?
There are several potential causes for frequent crashes on a mining rig. Check that your PSU provides enough power for all components, and ensure your overclocking settings are stable. If these do not solve the issue, you may need to reset your Windows OS to factory settings or adjust BIOS settings.
How can I prevent my rig from overheating?
To prevent overheating, regularly check that all cooling fans for your GPU and CPU are functioning properly. Make sure you have adequate room ventilation, and consider adjusting your overclocking settings if necessary.
Is it normal for a mining rig to generate a lot of heat?
Yes, it is normal for a mining rig to generate a significant amount of heat due to the intensive processing required for mining. However, proper ventilation and cooling measures should be taken to prevent overheating and potential damage to components.


